
Common Problems with Heat Exchangers and How to Troubleshoot Them
Heat exchangers sit at the heart of virtually every heating system you'll install or maintain. They're the workhorses that transfer thermal energy between fluids, whether that's heating domestic hot water in a combi boiler or keeping a commercial office block warm through winter. When they fail, everything grinds to a halt.
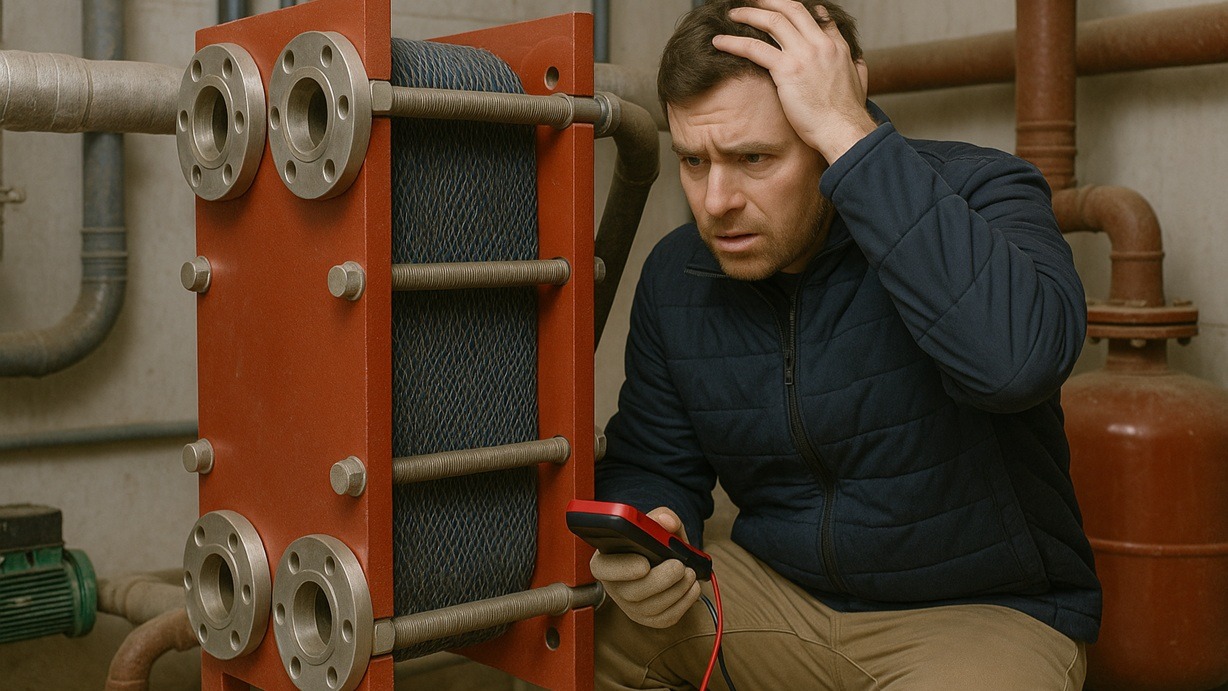
Heat exchanger issues cause more callbacks than most engineers care to admit. The problems range from gradual efficiency losses you won't spot until the energy bills arrive, to catastrophic failures that leave entire buildings without heat. Understanding how to heat exchanger troubleshoot effectively separates the apprentice who throws parts at a problem from the senior engineer who diagnoses root causes.
Most failures follow predictable patterns. Scaling reduces thermal transfer. Corrosion eats through metal. Fouling blocks flow paths. Get familiar with these issues and you'll fix systems faster, specify better solutions, and avoid the dreaded 3am emergency call.
Understanding Heat Exchanger Failures
Heat exchangers fail because they work in hostile environments. They handle temperature extremes, pressure fluctuations, and aggressive water chemistry daily. The constant thermal cycling, heating up, cooling down, heating up again, stresses metal components until something gives.
Primary heat exchangers in boilers take the worst punishment. They sit directly above burners, handling flame temperatures exceeding 1,000°C whilst circulating water at 60-80°C. Secondary heat exchangers for domestic hot water deal with different challenges: constant demand cycling and scale buildup from hard water.
The key to effective troubleshooting? Think like a detective, not a parts fitter. Look for patterns in when problems occur, which systems are affected, and what's changed recently. That approach saves time and money.
Scaling and Fouling: The Silent Killers
Walk into any plant room and you'll find at least one system suffering from scale buildup. It's inevitable in hard water areas. Calcium carbonate and magnesium deposits form on heat transfer surfaces, acting like an insulating blanket that chokes efficiency.
Scale thickness of just 1mm can reduce heat transfer by 10-15%. Let it build to 3-4mm and you're looking at 30-40% efficiency loss. The boiler works harder, burns more gas, and still struggles to maintain temperature. Worse still, localised overheating beneath scale deposits can crack heat exchanger plates.
Diagnosing Scale Problems
You'll know scaling's the culprit when systems show these symptoms:
- Reduced flow rates through the heat exchanger
- Rising gas consumption without increased heat output
- Kettling noises from boilers (that distinctive rumbling)
- Temperature differentials are narrowing between the flow and the return
Drop the system pressure and drain a sample from the lowest point. Cloudy white water or visible sediment confirms scale presence. For plate heat exchangers, measure pressure drop across the unit, a significant increase from commissioning readings points to internal fouling.
Cleaning Scaled Heat Exchangers
Chemical descaling works for most situations. Circulate a descaling solution (typically citric or hydrochloric acid-based) through isolated heat exchangers for 2-4 hours. Monitor pH levels throughout; you want the solution working, not eating through metal. Think of it like descaling a kettle, just on an industrial scale.
For severe scaling, mechanical cleaning's your only option. Pull the plate heat exchangers apart and scrub each plate individually. Shell and tube units need specialist lancing equipment to clear tubes properly. It's labour-intensive but necessary when chemical cleaning fails.
Prevention beats cure every time. Fit magnetic filters on heating circuits and dose inhibitors into the system water. In hard water areas, specify water softeners for DHW pumps and secondary heat exchangers. The upfront cost pays for itself in reduced maintenance.
Corrosion Problems
Corrosion destroys heat exchangers from the inside out. You won't see it until it's too late, a pinhole leak or catastrophic failure. Different metals corrode through different mechanisms, but they all end badly.
Oxygen corrosion attacks ferrous metals in open systems or poorly sealed circuits. Black iron oxide sludge accumulates, blocking narrow passages in plate heat exchangers. Galvanic corrosion happens when dissimilar metals touch in the presence of an electrolyte (system water). One metal becomes a sacrificial anode and corrodes rapidly.
Stainless steel heat exchangers aren't immune. Pitting corrosion attacks passive layers on stainless steel, particularly in chloride-rich water. Once started, pits deepen rapidly, eventually perforating thin-walled heat exchanger plates.
Spotting Corrosion Early
Check these indicators during routine maintenance:
- Rust-coloured or black system water
- pH levels below 7.0 (acidic water accelerates corrosion)
- Pressure loss requiring frequent top-ups
- Visible corrosion on external pipework (what's outside mirrors inside)
For plate heat exchangers on commercial circulators, inspect gaskets during annual services. Degraded gaskets and corrosion products around plate edges warn of internal damage before leaks develop.
Corrosion Prevention Strategies
Dose systems properly with corrosion inhibitors, molybdate or nitrite-based products protect ferrous metals effectively. Maintain system pH between 7.5-8.5 for optimal protection. Too alkaline and you risk scaling; too acidic and corrosion accelerates.
Fit deaerators on sealed systems to remove dissolved oxygen during initial fill. For large commercial installations, automatic dosing systems maintain inhibitor concentrations without manual intervention. Reflex and Flamco both offer complete water treatment packages worth considering.
Keep oxygen out of sealed systems. Check expansion vessel integrity annually; a failed membrane lets air into the circuit, restarting corrosion cycles you thought you'd stopped.
Leaking Heat Exchangers
Heat exchanger leaks range from annoying drips to system-flooding catastrophes. Location matters, a weeping gasket's an easy fix, but a cracked heat exchanger body means replacement. Get it wrong and you're back the next week.
I remember a job where a "leaking heat exchanger" turned out to be condensation from a poorly insulated flue connection dripping onto the unit below. The engineer before me had quoted £3,000 for a new heat exchanger. Twenty quid's worth of flue insulation fixed it. Always verify the source before diagnosing.
Common Leak Points
Gasket failures top the list for plate heat exchangers. Thermal cycling hardens gaskets over time until they lose sealing capability. You'll see weeping around plate edges, usually obvious during operation but dry when cold.
Brazed joints on compact heat exchangers crack under thermal stress or freeze damage. These leaks are internal, mixing heating and hot water circuits. A customer complaining about pink radiators (inhibitor-dyed water mixing with potable) flags this instantly.
Pin holes from corrosion or erosion appear anywhere water velocity's high or water chemistry's aggressive. Shell and tube heat exchangers develop leaks at tube-to-tubesheet joints. Primary heat exchangers in boilers perforate where flame impingement concentrates.
Leak Detection Methods
For external leaks, pressurise the system cold and inspect carefully. Use clean tissue paper around suspected leak points; water wicks up the paper, showing exactly where leaks originate. Fluorescent dye under UV light reveals tiny seeps you'd miss otherwise.
Internal leaks between circuits need different techniques. Test domestic hot water for heating system inhibitor using test strips. Presence of inhibitor confirms heat exchanger cross-contamination. Pressure testing isolated circuits identifies which side's leaking.
Repair or Replace?
Gasket replacement's straightforward for plate heat exchangers, if plates aren't corroded. Clean plate surfaces thoroughly, fit new gaskets, and torque bolts to manufacturer specs. Don't overtighten; you'll distort plates.
Brazed heat exchangers and cast-iron sectional units don't repair economically. When they leak, budget for replacement. The labour cost of attempted repairs exceeds new unit prices. Cut your losses and fit something better, perhaps upgrade to a high-efficiency model from Grundfos or Wilo whilst you're at it.
Poor Heat Transfer Performance
You've got flow, you've got pressure, but heat transfer's rubbish. The system staggers along, never quite reaching temperature. Users complain, and you're stuck explaining why their expensive heating system performs like a chocolate teapot.
Reduced heat transfer manifests gradually. Monthly gas consumption creeps up. Temperature differentials between flow and return narrow. Radiators at circuit ends stay cold. By the time someone calls you, efficiency's dropped 20-30%.
Diagnosing Heat Transfer Issues
Start with the basics, measure actual flow rates against design specifications. Undersized central heating circulators won't push enough water through heat exchangers, killing performance. Blocked strainers, closed valves, or airlocks restrict flow just as effectively.
Check temperature differentials across the heat exchanger. Design ΔT for heating circuits typically runs 10-20°C. Anything less suggests insufficient flow or oversized heat exchangers. Anything more points to undersized units or fouled heat transfer surfaces.
Thermal imaging cameras reveal hot spots on heat exchanger casings, areas where internal fouling or airflow problems concentrate heat. It's like using X-ray vision to see inside sealed units.
Root Cause Analysis
Internal fouling from scale or corrosion products tops the cause list. Even thin deposits dramatically reduce thermal conductivity. Copper oxide scale on tube internals or calcium carbonate on plate surfaces both throttle heat transfer.
Air ingress into sealed systems creates problems beyond corrosion. Air bubbles adhering to heat transfer surfaces insulate them from water flow. The effect is similar to scale but harder to diagnose. Automatic air vents at system high points help, but they won't fix poorly designed installations.
Flow imbalances in multi-zone systems send most water down the path of least resistance, starving other zones. That manifests as poor heat transfer in specific areas whilst others overheat. Balance valves need adjusting, or fit pressure-independent control valves to solve it properly.
Restoring Performance
Flush systems thoroughly before assuming heat exchanger replacement. Power flushing with appropriate chemicals removes years of accumulated sludge and scale. For really bad systems, specify multiple flushes with neutralising between chemical treatments.
Upgrade circulation pumps if undersized, modern high-efficiency pumps from DAB or Lowara often improve performance whilst reducing running costs. Variable speed pumps adjust flow rates automatically, maintaining optimal heat transfer across varying loads.
Consider replacing ancient heat exchangers with modern high-efficiency units. Technology's moved on, today's condensing heat exchangers extract 10-15% more heat from the same fuel input. The payback period's typically under five years on commercial installations.
Pressure Drop Problems
Excessive pressure drop across heat exchangers forces pumps to work harder, consuming more electricity and potentially causing cavitation. It's the hidden cost that owners don't see until utility bills arrive.
Design pressure drop for heat exchangers typically ranges from 10-30 kPa, depending on type and size. Double that and you're fighting the system. Triple it and something's seriously wrong. Break out the gauges and measure actual pressure drops, don't assume.
Identifying Pressure Issues
Install permanent pressure gauges on the heat exchanger inlet and outlet connections during commissioning. They'll tell you immediately when problems develop. A gradual pressure drop increase over months points to progressive fouling. Sudden increases suggest blockages or valve failures.
Calculate required pump head for your circuit. If you're specifying pressurisation units or circulators and ignoring heat exchanger pressure drop, you'll undersize equipment. That's a rookie mistake that causes endless problems.
Causes of Excessive Pressure Drop
Fouling and scaling reduce effective flow area, increasing velocity and pressure drop exponentially. A 50% reduction in flow area doesn't just double pressure drop, it quadruples it. That's basic fluid mechanics biting you.
Undersized heat exchangers create problems from day one. Someone saved a few quid specifying equipment, and now the system's fighting itself constantly. Check design calculations, often you'll find optimistic assumptions about temperature differences or heat loads.
Partially closed isolation valves or blocked strainers strangle flow. Simple stuff, but you'd be surprised how often it's the culprit. Always verify all valves are fully open and strainers are clean before diagnosing heat exchanger problems.
Solutions for Pressure Issues
Clean or replace fouled heat exchangers as described earlier. For undersized units, you've got two choices: operate the system at reduced capacity or replace with properly sized equipment. There's no magic fix for fundamental design errors.
Parallel heat exchanger installation reduces pressure drop by splitting flow. Two smaller units in parallel often perform better than one large unit, with the added benefit of redundancy. One can be isolated for maintenance whilst the other keeps running.
Combustion Problems in Boiler Heat Exchangers
Primary heat exchangers in boilers face unique challenges from combustion processes. Sooting, flame impingement, and thermal shock can destroy heat exchangers rapidly if combustion isn't properly controlled.
Incomplete combustion deposits carbon soot on heat exchanger surfaces. That insulates surfaces, reducing heat transfer and raising flue gas temperatures. Left unchecked, localised overheating cracks cast iron sections or warps steel heat exchangers. You'll smell it before you see it, that acrid, sooty smell in the plant room.
Recognising Combustion-Related Failures
Yellow or orange flames instead of crisp blue indicate poor combustion. Flue gas analysis reveals the story, high CO readings, low oxygen levels, or excessive CO₂ all point to burner problems affecting the heat exchanger.
Examine the heat exchanger during annual services. Heavy soot deposits, hot spots showing discolouration, or cracked sections visible through inspection ports demand immediate attention. Don't wait for complete failure.
Correcting Combustion Issues
Service burners according to the manufacturer's schedules. Clean burner nozzles, check gas pressures, and verify air/fuel ratios using calibrated analysers. A properly set up burner from Remeha or Vaillant equipment should achieve combustion efficiency above 90% with minimal CO production.
Replace damaged heat exchangers; don't attempt repairs on units showing thermal stress damage. Modern condensing boilers require precise combustion control to prevent heat exchanger corrosion from condensate. Follow manufacturer's water quality requirements religiously.
Preventative Maintenance: Your Best Defence
Every callback you prevent saves money and protects your reputation. Heat exchanger maintenance isn't glamorous, but it's effective. Build these checks into every service visit.
Inspect heat exchangers annually as a minimum; commercial installations warrant six-monthly checks. Look for corrosion, scale buildup, gasket condition, and mounting bracket integrity. Catch problems early and repairs cost pence. Miss them and you're quoting thousands.
Test system water chemistry. pH, inhibitor concentration, and hardness levels tell you what's happening inside sealed systems. Adjust chemical treatment before corrosion starts, not after. Mikrofill systems excel at maintaining optimal water conditions automatically.
Clean strainers and filters at every service. The muck accumulating there would otherwise lodge in the heat exchanger passages. Magnetic filters pull iron oxide from circulation before it damages components. Empty them regularly.
Log all measurements. Record pressure drops, temperatures, flow rates, and water test results. Trends reveal developing problems, a gradual pressure drop increase, or declining temperature differential warns of fouling before performance suffers noticeably.
When to Replace Rather Than Repair
Sometimes throwing good money after bad makes no sense. If your heat exchanger's seen better days and repairs keep mounting up, cut your losses. New equipment pays for itself through improved efficiency and reduced maintenance costs.
Replace heat exchangers when:
- Repair costs exceed 50% ofthe replacement cost
- Multiple failures occur within 12 months
- Heat exchanger efficiency has dropped below 70% of design
- Spare parts are no longer available (obsolete equipment)
- Corrosion or stress damage is extensive
Modern heat exchangers from manufacturers like Grundfos and Ebara operate 15-20% more efficiently than units from even a decade ago. Factor energy savings into replacement decisions; higher upfront costs often pay back within 3-5 years on commercial installations.
Consider upgrading to plate heat exchangers when replacing shell and tube units. They're more compact, easier to maintain, and typically more efficient. The installation might need modification, but long-term benefits justify the work.
Expert Heat Exchanger Solutions from National Pumps and Boilers
Heat exchanger troubleshooting isn't rocket science, but it demands methodical thinking. Don't guess, measure, test, and verify before reaching for your wallet or the client's. Half the problems you'll encounter trace back to poor water quality or inadequate maintenance, not failed equipment.
National Pumps and Boilers stocks a comprehensive range of heat exchangers, circulators, and system components from leading manufacturers. Whether you're replacing a failed domestic unit or specifying equipment for a large commercial project, the technical team can guide you towards solutions that actually work.
Keep learning. Attend manufacturer training courses, read technical bulletins, and stay current with regulations. The heating industry evolves constantly, condensing technology, variable speed pumps, and smart controls change how systems operate and fail. What worked five years ago might not cut it today.
Most importantly, document everything. Those temperature readings, pressure measurements, and water test results you recorded create a baseline for future comparison. When problems develop, you'll diagnose them faster because you know what "normal" looks like for that specific system.
Need technical advice on heat exchanger selection or troubleshooting support? Contact us for expert guidance from experienced heating engineers who understand real-world system challenges.