
How to Install a Submersible Pump in Commercial Water Systems
When it comes to managing water efficiently and reliably in commercial settings, a submersible pump stands out as a versatile and powerful solution. These pumps are engineered to operate while fully immersed in the fluid they are intended to move, offering significant advantages in various applications, from the essential task of dewatering construction sites and managing groundwater to the more complex handling of wastewater and boosting water supply. Understanding the nuances of a proper submersible pump setup and knowing how to install a submersible pump correctly are crucial for ensuring optimal performance, longevity, and safety of your water management systems. Let’s delve into a comprehensive step-by-step guide to help you navigate this process smoothly and effectively.
Understanding Submersible Pumps: The Underwater Workhorse
Before we embark on the detailed installation process, it's essential to have a solid understanding of what a submersible pump is and why it's the preferred choice for many commercial applications. Unlike their surface-mounted counterparts that rely on suction to draw water upwards, submersible pumps are designed to be placed directly within the fluid. This design eliminates the issue of cavitation, which can occur in suction pumps when the pressure drops too low, causing vapour bubbles to form and potentially damage the pump. By pushing the water upwards, submersible pumps offer greater efficiency and reliability, especially in situations where the water source is significantly below the pump's location. National Pumps and Boilers offer a diverse range of high-quality submersible pumps tailored to meet the demands of various commercial environments.
Key Components: Anatomy of a Submersible Pump
A submersible pump is a sophisticated piece of machinery comprising several integral parts that work in concert to achieve efficient water movement:
- Motor: The heart of the pump, typically an electric motor that is hermetically sealed to prevent water ingress. This watertight enclosure is critical for the pump's ability to operate underwater safely and reliably.
- Impeller: This is the rotating component with vanes designed to impart kinetic energy to the fluid, effectively pushing it upwards through the pump and into the discharge pipe. The design and material of the impeller are crucial for the pump's efficiency and its ability to handle different types of fluids, including those with suspended solids.
- Housing: The outer casing that protects the motor and the impeller assembly from the surrounding water and any abrasive particles present in the fluid. The material of the housing is chosen based on the application and the properties of the fluid being pumped to ensure corrosion resistance and durability.
- Intake Screen or Strainer: Located at the pump's inlet, this component prevents large debris and solids from entering the pump, which could cause blockages or damage to the impeller and other internal parts.
- Seals: Multiple types of seals, such as mechanical seals and lip seals, are used to ensure a watertight barrier around the motor shaft and other critical points, preventing water from entering the motor compartment.
- Power Cable: A specialised waterproof cable designed to supply electrical power to the motor while submerged. The connection point where the cable enters the pump is meticulously sealed to maintain the integrity of the motor enclosure.
- Non-Return Valve (Check Valve): Often integrated into the pump or installed in the discharge line, this valve prevents backflow of water into the pump when it stops, which can protect the pump and the system from pressure surges.
Pre-Installation Considerations: Laying the Groundwork for Success
Before you proceed to install submersible pump, thorough preparation is paramount. This stage involves a careful assessment of the site, understanding regulatory requirements, selecting the appropriate pump, and gathering all necessary tools and materials.
Assessing Site Conditions: Understanding Your Operational Environment
The first step in any successful submersible pump setup is a comprehensive evaluation of the installation environment. Consider the following factors:
- Accessibility: Can the installation site be easily accessed for both the initial installation and future maintenance? Ensure there is sufficient space to manoeuvre equipment and personnel safely.
- Space Constraints: Evaluate the physical dimensions of the well, sump, or tank where the pump will be placed. Ensure the chosen pump fits comfortably without obstruction.
- Water Source Characteristics: Understand the depth of the water source, the expected water level fluctuations, and the quality of the water (e.g., presence of sediment, chemicals). This will influence the type of pump and materials required.
- Environmental Factors: Consider any environmental conditions that might affect the installation or the pump's operation, such as extreme temperatures or potential for flooding.
Permits and Regulations: Navigating the Legal Landscape
Ignoring local regulations can lead to significant complications and delays. It is crucial to:
- Identify Required Permits: Research and determine if any permits are required for the installation of a submersible pump in your specific commercial application. This might involve contacting your local council or water authority.
- Compliance with Codes: Ensure that your installation plans comply with all relevant electrical and plumbing codes. This is vital for safety and to avoid potential legal issues.
Choosing the Right Pump: Matching the Pump to the Purpose
Selecting a pump that is appropriately sized and designed for your specific application is fundamental to achieving efficient and reliable water management. Key factors to consider include:
- Flow Rate: The volume of water that needs to be moved per unit of time (e.g., litres per minute, cubic metres per hour). This will depend on the demands of your commercial system.
- Head Pressure: The total height that the pump needs to lift the water, including the vertical distance from the pump to the discharge point and any frictional losses in the piping system.
- Pump Type: Different types of submersible pumps are designed for specific applications, such as dewatering pumps for construction sites, wastewater pumps for sewage, and borehole pumps for deep wells. National Pumps and Boilers offer expert advice to help you select the most suitable pump from leading brands like Grundfos, Lowara, and Wilo.
- Material Compatibility: Ensure the pump's materials of construction are compatible with the fluid being pumped to prevent corrosion or degradation.
Tools and Materials Needed: Gearing Up for the Task
Having all the necessary tools and materials readily available will streamline the installation process and minimise delays.
Essential Tools: The Installer's Arsenal
- Wrenches (various sizes): For tightening and loosening bolts and fittings.
- Pliers: For gripping, cutting, and bending wires.
- Screwdrivers (various types and sizes): For securing electrical connections and assembling components.
- Pipe Cutters: For preparing pipes to the required length.
- Pipe Wrenches: For securely tightening threaded pipe connections.
- Electrical Multimeter: For testing electrical circuits and ensuring correct wiring.
- Drill with appropriate bits: For securing mounting brackets or making pilot holes.
- Tape Measure: For accurate measurements.
- Spirit Level: To ensure the pump is installed vertically.
- Hoist or Lifting Equipment: For safely lowering and lifting heavier pumps.
Materials: The Building Blocks of the Installation
- Discharge Piping: Select pipes of the correct diameter and material (e.g., PVC, HDPE, stainless steel) suitable for the application and pressure requirements.
- Fittings: Including elbows, couplings, adapters, and unions to connect the piping sections.
- Electrical Wiring and Connectors: Ensure the wiring is of the correct gauge and type for the pump's power requirements and that all connectors are waterproof and suitable for submersible applications.
- Cable Ties or Clamps: For securing the power cable to the discharge pipe to prevent strain on the electrical connections.
- Safety Rope or Cable: For safely lowering and retrieving the pump (especially in deeper installations).
- Waterproof Tape or Sealant: For ensuring watertight connections.
- Anchoring System (if required): To secure the pump in place and prevent movement.
- Safety Gear: Includes protective gloves, safety goggles, and appropriate workwear.
Step-by-Step Installation Process: Bringing It All Together
Now that you have a solid understanding of the fundamentals and have gathered all the necessary resources, let’s proceed with the detailed steps to install submersible pump.
Step 1: Preparation: Setting the Stage for Installation
- Isolate the Power Supply: Before commencing any work, ensure that the power supply to the installation area is completely shut off and locked out to prevent accidental energisation.
- Drain the System: If you are replacing an existing pump or working in a system containing water, ensure it is fully drained to provide a safe and workable environment.
- Clear the Work Area: Remove any debris, obstructions, or hazards from the installation site to ensure a safe and efficient workflow.
- Inspect the Pump: Carefully inspect the new submersible pump for any signs of damage that may have occurred during shipping or handling.
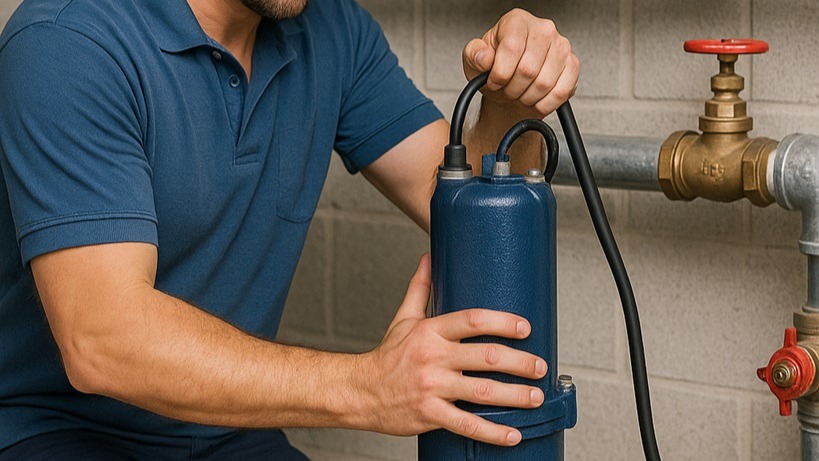
Step 2: Installing the Pump: Positioning for Optimal Performance
- Lowering the Pump: If installing in a well or deep sump, use a sturdy rope or cable attached to the pump's lifting handle. Slowly and carefully lower the pump into the water source. Avoid lowering the pump by its electrical cable, as this can damage the connections. For heavier pumps, use appropriate lifting equipment.
- Positioning: Ensure the pump is positioned at the correct depth as recommended by the manufacturer and suitable for your application. The intake screen should be submerged at all times, but the pump should not be resting on the bottom, where sediment can accumulate. Consider using a pedestal or base to elevate the pump slightly.
- Stability: Ensure the pump is stable and will not tip over during operation. In some installations, it may be necessary to secure the pump using an anchoring system.
Step 3: Connecting the Discharge Pipe: Ensuring Efficient Water Flow
- Attach Fittings: Connect the appropriate fittings to the pump's discharge port. Ensure all threaded connections are properly sealed with waterproof tape or sealant to prevent leaks.
- Assemble Piping: Assemble the discharge piping, ensuring it is securely connected to the pump and extends to the desired discharge point. Use appropriate fittings to navigate any bends or changes in direction.
- Support the Piping: If the discharge pipe is long or heavy, provide adequate support to prevent strain on the pump connections.
- Install Non-Return Valve (if applicable): If a non-return valve is not integrated into the pump, install one in the discharge line to prevent backflow.
Step 4: Electrical Connections: Wiring for Safety and Reliability
This step should only be performed by a qualified electrician to ensure safety and compliance with electrical codes.
- Connect Power Cable: Carefully connect the submersible pump's power cable to the site's electrical system according to the manufacturer's wiring diagram and local electrical codes. Ensure all connections are secure and properly insulated to prevent water ingress and electrical hazards.
- Use Waterproof Connectors: Employ waterproof connectors specifically designed for submersible pump applications to maintain the integrity of the electrical connections in a wet environment.
- Grounding: Ensure the pump and the electrical system are properly grounded to protect against electrical shock.
- Cable Management: Secure the power cable to the discharge pipe using cable ties or clamps at regular intervals to prevent strain on the electrical connections and ensure it does not interfere with the pump's operation.
Step 5: Testing the System: Verifying Performance and Identifying Issues
- Initial Fill: Slowly allow the water to refill the system, checking for any leaks in the pipe connections.
- Power Up: Once the system is filled, carefully turn on the power supply.
- Monitor Performance: Observe the pump's operation. Check for unusual noises, vibrations, or leaks. Monitor the flow rate and discharge pressure to ensure they meet the expected performance specifications.
- Check for Overheating: Run the pump for a period and check for any signs of overheating.
- Cycle the Pump: If the system includes a float switch or other control mechanism, test its operation by allowing the water level to rise and fall to ensure the pump starts and stops correctly.
Post-Installation Checks: Ensuring Long-Term Reliability
After the initial installation and testing, perform a final inspection to ensure everything is in order for long-term, reliable operation.
- Review Connections: Double-check all pipe and electrical connections for any signs of leaks or loose fittings.
- Secure Components: Ensure the pump is stable, the piping is adequately supported, and the electrical cables are securely fastened.
- Document Installation Details: Keep a record of the pump model, installation date, wiring diagrams, and any specific installation notes for future reference.
- Establish a Maintenance Schedule: Implement a routine maintenance schedule to inspect the pump, check for wear and tear, and ensure optimal performance over time.
Common Issues and Troubleshooting: Addressing Potential Problems
Even with a meticulous installation, issues can occasionally arise. Being aware of common problems and their potential solutions can save time and prevent more significant complications.
- Strange Noises: Unusual sounds such as grinding, rattling, or whining can indicate various problems, including airlocks, debris in the pump, bearing failure, or cavitation. Investigate the source of the noise and take appropriate corrective action.
- Poor Performance (Low Flow or Pressure): This could be due to a blocked intake screen, a clogged discharge pipe, an undersized pump, excessive head loss in the system, or a malfunctioning impeller. Inspect these components and ensure they are functioning correctly.
- Pump Not Starting: Check the power supply, circuit breaker, wiring connections, and any control devices such as float switches. A tripped overload protector in the motor can also prevent starting.
- Pump Overheating: This can be caused by running the pump dry, a blocked intake, an undersized pump for the application, or a motor fault. Ensure the pump is always submerged during operation and that there is adequate flow.
- Leaks: Check all pipe connections, seals, and the pump housing for any signs of leaks and tighten or replace components as necessary.
Why Choose National Pumps and Boilers for Your Submersible Pump Needs: Your Trusted Partner in Water Management
At National Pumps and Boilers, we understand the critical role that reliable water management plays in commercial operations. We pride ourselves on our extensive expertise in providing high-quality submersible pumps from leading manufacturers. Our team is dedicated to helping you select the right pump for your specific needs and can offer guidance throughout the submersible pump setup process. We offer a comprehensive range of pumps suitable for various commercial applications, including robust commercial circulators and efficient pressurisation units. Our commitment to exceptional customer service means you can trust us to support you every step of the way, from initial selection to after-sales support. We also stock pumps from renowned brands like DAB and Ebara, ensuring you have access to the best products on the market.
Ready to Install Your Submersible Pump? Contact National Pumps and Boilers Today!
If you are looking to install submersible pump for your commercial water system or require expert advice on the best submersible pump setup for your specific application, don't hesitate to contact National Pumps and Boilers today. Our knowledgeable team is ready to assist you with product selection, technical guidance, and any other support you may need. Let us partner with you to ensure your water management systems are efficient, dependable, and tailored to meet the unique demands of your commercial environment. We are committed to providing solutions that offer long-term performance and reliability, helping your business operate smoothly and efficiently.