
Installing Heat Recovery Systems: A Step-by-Step Guide for Commercial Buildings
A successful heat recovery project is more than just bolting a box to a wall. It's a calculated process that starts with a proper survey and ends with a finely balanced system that does what it says on the tin. Getting it wrong leads to noise complaints, poor performance, and wasted energy, the very things the system was meant to fix.
The whole point is to capture waste heat and put it back to work, taking the strain off the main boilers. To get it right, you need to understand the building, pick the right kit, and be methodical with the install. A proper heat recovery unit installation pays you back in lower bills; a rushed job is just another headache for the building manager.
Step 1: The Pre-Installation Survey and Specification
Before a single tool comes out of the van, a proper site assessment is non-negotiable. This first step makes or breaks the entire project. You have to get a real handle on the building's heating and ventilation demands to specify a system that's actually right for the job.
This means more than a quick look around. A detailed survey involves calculating heat loads, spotting sources of waste heat, and mapping out the existing HVAC setup. The building's size, layout, and how it's used are all critical facts. For example, a restaurant kitchen with high-output cooking equipment presents a massive opportunity for heat recovery, but also requires specialist filtration to deal with grease. An office block, on the other hand, has a more consistent, lower-grade heat source from occupants and IT equipment.
A key part of the survey is establishing the required ventilation rates, guided by documents like the CIBSE Guides and Building Regulations Part F. This calculation determines the volume of air that needs to be moved, which in turn dictates the size of the unit and the ductwork. This groundwork ensures the specified system, whether it’s a full HRV installation or a standalone unit, is correctly sized to deliver real energy savings without being excessively noisy or expensive to run.
Step 2: Selecting the Right System and Components
Once the survey's done, it's time to pick the hardware. This isn't just about the main unit; the system is only as good as the pumps and controls that support it.
Heat Recovery Units vs. HRV Installation
It is important to distinguish between the two main approaches. A standard heat recovery unit installation typically involves capturing heat from a process or exhaust air stream to preheat water or air elsewhere. This is common in industrial settings. In contrast, an HRV installation is a complete ventilation solution that provides fresh, filtered air while recovering heat from the outgoing stale air. This is the more common approach for offices, schools, and residential blocks where occupant health and comfort are paramount.
The Heart of the System: The Heat Exchanger
The type of heat exchanger core inside the unit has a big impact on performance. Plate heat exchangers are common, reliable, and have no moving parts, keeping stale and fresh air streams completely separate. Rotary heat wheels can be slightly more efficient at transferring heat but do have moving parts and the potential for a small amount of crossover between air paths, so they aren't suitable for environments where cross-contamination is a concern, like hospitals.
Essential System Components
A heat recovery system relies on a number of key components to work effectively. High-efficiency pumps are needed to move heated fluid around the building in hydronic systems. Leading brands like Wilo and Grundfos offer intelligent circulators that adjust their output to match demand, saving a huge amount of electricity.
Equally important are the system's pressure controls. Every sealed heating system needs correctly sized expansion vessels to absorb pressure fluctuations as the water heats and cools. This protects pipework and components from stress, preventing leaks and premature failure. For larger commercial systems, dedicated pressurisation units are often required to maintain the correct system pressure automatically.
A Cautionary Tale: The Noisy Office Installation
There was a case in a city-centre office where a contractor had fitted a new heat recovery system. The problem was, they'd rushed the job. The unit was technically the right size, but the ductwork was undersized and had too many sharp bends. To get the specified airflow to the furthest rooms, the commissioning engineer had to crank the fans up to maximum speed.
The result was a constant, irritating hum that echoed through the ceiling voids. Staff in the finance department said it was like working next to a server room. Productivity dipped, complaints mounted, and the client was unhappy. The original installer couldn't fix it. A specialist team had to go in, redesign the main duct runs using larger-radius bends, and rebalance the whole system. It was a costly lesson in the importance of getting the fundamentals right. A perfect heat recovery unit installation is undone by poor system design.
Step 3: The Installation Process
Once the kit is on site, the physical install can get started. It has to be done by the book, following the manufacturer's instructions to the letter.
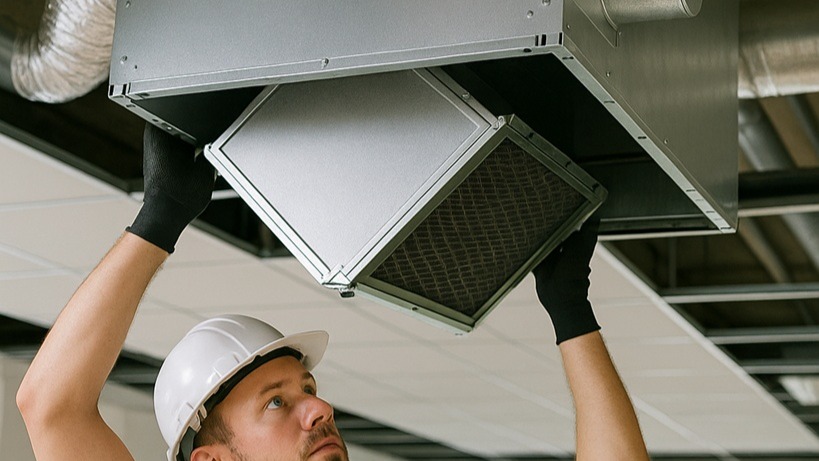
- Mounting the Unit: The heat recovery unit must be mounted securely, with enough room left around it for future maintenance, especially for filter access. Anti-vibration mounts are essential to stop mechanical noise from travelling into the building's structure. A crucial but often forgotten detail is ensuring the unit is level and has a slight fall towards the condensate drain.
- Ductwork and Pipework: This is where many installations go wrong. All ducting must be the right size, sealed at every joint to be airtight (as per DW/144 standards), and insulated to stop heat from escaping. For hydronic systems, pipework must be routed efficiently to keep pressure drop low, reducing the workload on the commercial circulators.
- Condensate Management: As warm, damp air cools in the heat exchanger, water will condense. This condensate must be safely drained away. The installation needs a correctly sized drainpipe with a proper trap to prevent smells from being drawn back into the unit. A blocked condensate drain can cause water to back up and flood the unit, causing major damage.
- Integrating Controls: The system's controls need to be wired in properly. This includes connecting temperature and humidity sensors, setting up the control panel, and tying it into the building's main management system (BMS) if there is one. Modern controls include features like frost protection cycles, which are vital for UK winters, and filter-clogged alerts.
Step 4: Commissioning and Balancing
The job isn't done when the last screw is tightened. The most important part is the commissioning. This is where the system is tested and tweaked until it runs exactly as it should. It's like tuning an engine; skip this, and you'll never get the performance you paid for.
For an HRV installation, this means using specialist equipment like a balometer or anemometer to measure the airflow at every single supply and extract grille. The engineer then adjusts the dampers in the ductwork until the system is perfectly balanced, ensuring it extracts and supplies the right amount of air to each space. An unbalanced system can lead to rooms being either over-ventilated and draughty or under-ventilated and stuffy.
For a hydronic system, it means setting the pump speeds and balancing valves to get the correct flow rates through the heat recovery coil. The commissioning engineer documents all these final settings in a report, which forms a crucial part of the project handover documents.
Step 5: Ongoing Maintenance and System Care
A heat recovery system is not a fit-and-forget solution. Like any hard-working piece of mechanical kit, it needs regular maintenance to keep performing efficiently and reliably. A simple maintenance schedule is the best way to protect the initial investment.
The most critical task is checking and changing the filters. Clogged filters restrict airflow, forcing the fans to work harder and use more energy, and they drastically reduce the quality of the air being supplied. Filters should typically be checked every three to six months and replaced as needed.
Other routine checks include cleaning the heat exchanger core, ensuring the condensate drain is clear, and visually inspecting the fan motors and belts. A well-maintained system will provide years of efficient service; a neglected one will quickly become inefficient and unreliable.
Your Partner for High-Performance HVAC
Getting a commercial HVAC system to run efficiently means getting every single detail right. From the survey to the final sign-off, the quality of every part matters. A great system isn't just a pile of good parts; it's one where everything works together properly.
That’s why sourcing components from a supplier with deep technical knowledge is so important. The experts at National Pumps and Boilers understand the demands of commercial projects. They can provide the technical support needed to select the right equipment for any application. If you require assistance for your next project, get in touch for practical, expert advice.